How to Create a New ADORA Model
After installing the ADORA plugin and restarting the Eclipse Environment, you're ready to create your first ADORA model. For doing so, you need first a eclipse project. This can be any sort of eclipse project, i.e. ADORA model files can be put in any type of project folder. If you don't have a project (folder), you need to create one in the package explorer. Do this by right-clicking in the package explorer, choose New / Project, as shown in Fig. 1. This starts up the project wizard.
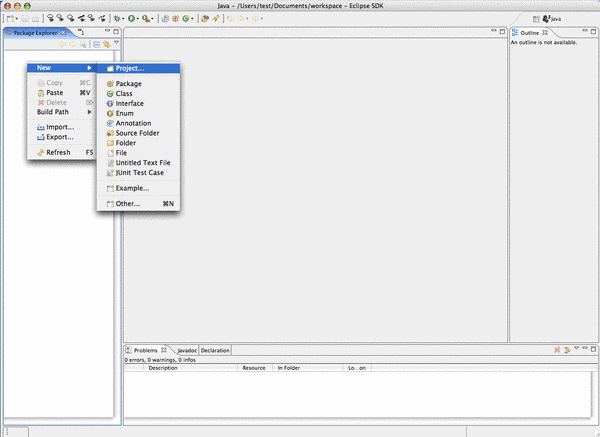
Fig. 1: Starting up the project wizard for creating a new ADORA project.
After doing the steps above, the first page of the New Project wizard appears (Fig. 2). There you have the possiblity to choose from different types of projects. For doing the first steps in ADORA model, it is sufficient to choose a simple project. Open the category Simple and choose the Project entry. Click on Next.
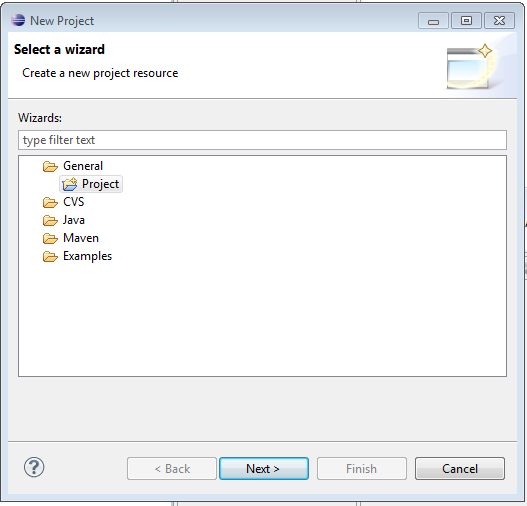
Fig. 2: The first page of the New Project wizard.
After choosing the type of the project, you have to enter the name of the project (Fig. 3). Enter a name of your choice. You can also choose another physical location for the project and its contents. Defaultly, this will be the eclipse workspace but you can choose any location on your harddrive. After choosing a name and possibly a location for the project content press Next. The project will be created now. It is accessible in the package explorer.

Fig. 3: The second page of the New Project wizard where you have to enter a project name and possibly a location.
After the creation of the eclipse project, you're ready for creating the ADORA model. For doing so, just right-click on the recently created project folder in the package explorer. Choose from the menu which appears New / Other (see Fig. 4).
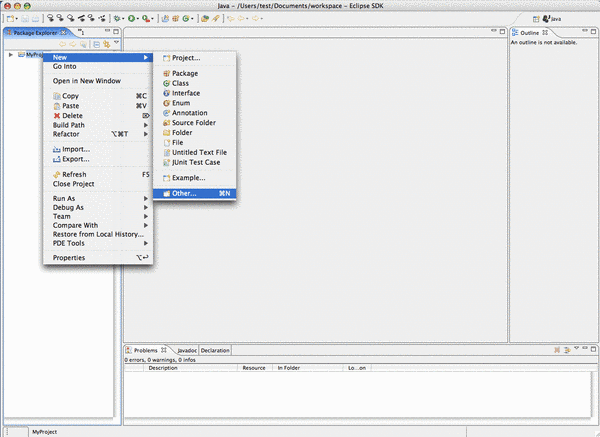
Fig. 4: Creating a new ADORA model by opening the New ADORA Model wizard.
Now, the New ADORA Model wizard appears. The first page lets you choose the type of the document to create (Fig. 5). Choose there ADORA Model from ADORA and click on Next.
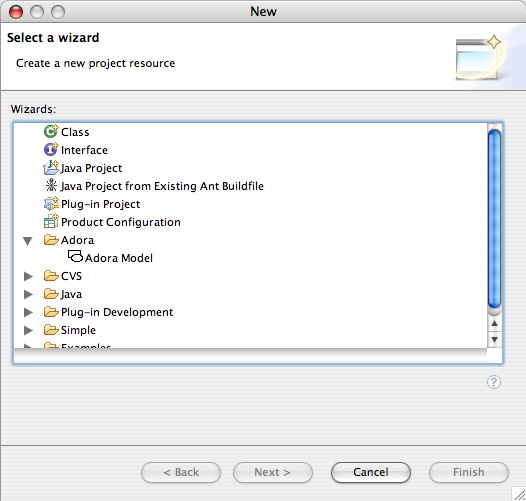
Fig. 5: Choosing ADORA Model as the type of the Document to create.
The second page of the ADORA Model wizard asks for a model name and in which project to place the new model document (Fig. 6). Enter a name and choose a folder if necessary. Click on Next. The model will be created now and the editor with the empty model canvas opens (Fig. 7).
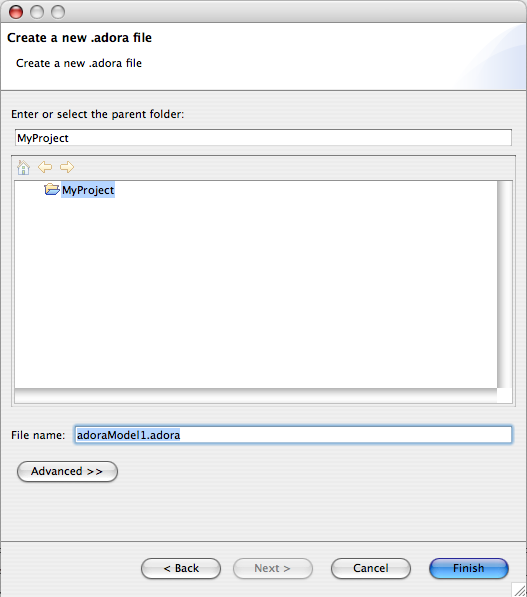
Fig. 6: The second page of the New ADORA Model wizard.
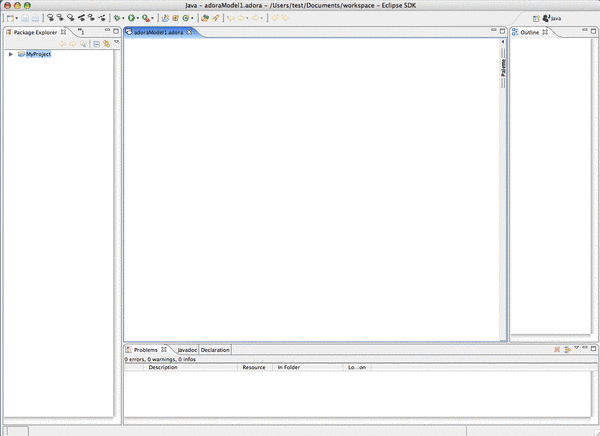
Fig. 7: The new model is opened in the ADORA editor after being created.
The ADORA Editor consists of a whole Eclipse perspective which shows the elements being useful in combination with the model editor. For more information see the ADORA help in the Eclipse environment.